Showing posts with label Sides. Show all posts

Monday, September 15, 2014

Tomato & Cucumber Salad

Tis the season of garden abundance (well the grand finale of summer favorites). I love this salad because it combines two of my favorite garden veggies. Our whole family loves this salad. I love that it is easy and makes a stellar side dish using seasonal produce.

Tomato & Cucumber Salad

1- pint Cherry Tomatoes
2- Cucumbers
Soft Goat Cheese (or Feta if you prefer) (to taste)
2 TBS Olive Oil
2 TBS Lemon Juice
Small handful of chives and mint (optional)
Sea Salt


Combine all of the above and enjoy some summer goodness!

These proportions are a quick estimate of what I've thrown together.  I adjust it often depending on how many people will be eating this salad.  It's pretty hard to mess up so experiment and enjoy!


Thursday, June 26, 2014

Jell-o (Vegan)

Jell-o seems like a childhood novelty.  I have fond memories of those brightly colored jello jigglers at almost every holiday, just in different bright, radiant colors . BUT now I would rather my girls not be ingesting the gelatin and food dyes found in most of those tasty little treats geared to kids.  I have played around with homemade jello for the last couple of years.  My girls have usually liked it but recently I nailed it. It's so easy and quick and I feel way better about serving this to the little ones in my life.

This recipe uses Agar Agar, which is plant based and derived from sea vegetables. Over the past year I have learned so much more about good quality gelatin and it's health benefits that I would actually like to try that as well. Either way it's creating a snack with a quality ingredient that doesn't have all the extra dyes, chemicals, and preservatives.

The recipe I used had 3 ingredients.  Below is the base or skeleton of the recipe. Start there and play around.  Adjust the flavors.  Get creative.

It would work to combine different juices, fruit purees, or even add fruit pieces (which I haven't tried but everything I have read online says it will work).  Sweetener could also be added.  I have been using 1 cup of elderberry tea  that I make from simmering whole elderberries with water.  Elderberries are  immune boosting so I will be making these this fall when the nasty colds and flu start rearing their ugly heads again.
I then add 1 cup of 100% Organic Grape Juice.  My girls seem to think it is sweet enough so we roll with it. I personally think the trick is what the jello is poured into to set.  I have been using little silicone molds I picked up at Ikea and Michaels, and my silicone muffin cups.  This has made a world of difference. Not to mention they turn out cute and are in fun little shapes.  Yep, move on over Jell-o Jigglers.
  If you come up with a favorite combination please do share.  This is becoming a staple at our house, and I would love to experiment with some different flavors and fruits we haven't used yet.


Jell-o 

2 cups of fruit juice
2 tsp Agar Agar powder

Heat juice on stove.  Before it boils add agar agar and stir constantly until it boils. Once it reaches boiling make sure agar agar has been dissolved and then allow the mixture to simmer on low for 5-10 minutes. Finish by pouring into molds.  Allow to cool on counter top and then serve.

*if using agar flakes you will need to add 2 TBS 


Monday, May 19, 2014

Mango Salsa

Mango Salsa.  Not much needs to be said about this delicious salsa.  I love tossing it on quesadillas, tacos, nachos, or just eating it with some delicious chips.  My girls love this salsa and will pretty much eat anything that it is on.
I have been buying organic frozen mango at Costco.  I love buying frozen mango because it makes the prep for this salsa so much easier.  I love a good fresh mango but I really despise peeling them.  Frozen mango makes that job so much easier.  I toss some frozen mango in the toaster over or on the stove for a few minutes to thaw.  Then I add the rest of the ingredients to the food processor.  I just do it by sight because it really depends on how much I need.  I have made little batches to be a light topping on a meal and bigger batches to serve as it's own salsa dip for a party.  The following is what you will need and then you chop or let the food processor chop away.  It's simple and easy.  If you are the type of person that needs a recipe or exact measurements,
creating something in this way might just be good for you.  You can thank me for that challenge later.

Mango Salsa

Mango 
Tomato(s)
Red Onion
Cilantro
Salt 
Lime (I squeeze a bit of the juice in the salsa)


Sunday, February 16, 2014

Hummus

One of the staples around our house is hummus.  There are so many things I love about hummus.  One is that it is incredibly easy to make. I also love that it packs a nice protein punch.  It is a great way to get kids to eat fresh veggies.  It is easy to pack up for a picnic lunch or a lunch on the go. It goes well on wraps and sandwiches.  Makes a great dip for all kinds of fresh veggies and/or crackers.  Really it is just a staple to have in the fridge. 

This is my basic hummus recipe. I will sometimes add roasted red peppers or sun dried tomatoes to this recipe to give it a little more spunk and to mix things up a bit. 

Hummus

3 cups of garbanzo beans (or use 2 cans which is sligthly more)
**1/4 cup raw sesame seeds
1 1/2 TBS extra virgin olive oil
1/4 cup lemon juice
2-4 garlic cloves
1 tsp cumin
Fresh parsley (to taste.....I enjoy parsley and use a pretty good size handful)
2 TBS fresh chives
2 tsp Herbamere
Sprinkle Sea Salt

**tahini is typically the ingredient here, which is simply ground sesame seeds.  If you have a vita-mix or other high powered blender you can just toss in the sesame seeds and don't need to buy tahini. 

Mix all of the above ingredients together in a blender or food processor and blend until smooth.  I sometimes add a little water if the mixture is to thick. 

One trick I learned a few years ago is that the best hummus is made from freshly cooked garbanzo beans.  So if you cook your own beans make the hummus shortly after the beans are done for a smooth, creamy hummus. If you are using canned beans warm them up and then make your hummus.  It really does make quite a difference. 

Saturday, April 13, 2013

Beet Salad

As a kid I thought that can of beets my mom used to sit on the table was quite honestly one of the more gross things in life.  Apparently pickled beets made my nose scrunch.  The most amusing part is that I don't know if I ever even attempted a taste or it I was just so repulsed by their visual presentation.  Whatever the situation I decided a few years ago to give beets a try.  Whoa! I fell in love. 
I absolutley love beets now and laugh at how repulsed I was as a child by those lovely sweet vegetables.  I love them juiced, grated in salads, and roasted.  One of my favorite things to do with beets is make a beet salad. Oh my stars! This is one of my favorite salads on the planet and it is almost always a hit at a party or potluck. 
I have tried a few different versions of beet salads but I always come back to this simple version that I slightly adapted from my friend Heather's cooking class a couple summers ago.  It truly is divine!

Roasted Beet Salad

Beets (2 bunches)
Beet Greens, Swiss Chard, Kale, or Spinach (finely chopped)
Almond Cheese or Soft Goat Cheese
1 TBS Dijon Mustard
1 TBS Raw Honey
3-4 TBS Balsamic Vinegar
1/4 cup Olive oil (or to taste)
Salt & Pepper (to taste)

The first step is to scrub the beets and then roast them.  There are a couple ways of doing this.  The beets can be wrapped individually with foil and placed in a pan with an inch or so of water.  Another option is to place all the beets in a dish with an inch or so of water and simply cover the whole pan with a piece of foil.  I have found both ways yield delicious roasted beets.

Roast the beets at 350 for 1 1/2 hours.  This time may vary depending on the size of the beets so check them after about 60 minutes and know they are done when it is easy to pierce them with a fork. 

While the beets are roasting make the vinaigrette.  Mix together the mustard, honey, vinegar, olive oil, salt, and pepper. 

When beets are finished allow them to cool.  The next step is to peel the skins off the beets, which is a little messy but oh so worth it! I have found that sometimes the skins will just slip right off the beets using just your hands, especially in the summer when they are really fresh.  Otherwise a vegetable peeler works nicely to gently remove the skins.  It should still be pretty easy if the beets are roasted well.  After the beets are peeled chop them into bite-sized pieces.

Next add the chopped beets to a large mixing bowl with the vinaigrette.  Mix well to coat the beets.  Then add the finely chopped beet greens (or other green).  The amount of greens is really up for debate.  Add what looks appetizing.  If beets are fresh and in season using all the gorgeous greens that came on them seems to be the perfect amount.  Final step is to add the cheese.  The amount of cheese to use is really up to the individual taste as well.  I usually just add cheese until it looks good to me.  I have found I don't need a whole lot of cheese because I don't want the cheese to overpower the salad.  A few sprinkles will usually do the job.

Mix the final mixture together well and enjoy!


Thursday, June 28, 2012

Vegan Bean Dip

Tis the season of cookouts and picnics.  When the temps soar I am constantly on the look out for easy meals.  I try to find meals that require the least amount of time in the kitchen possible so I can maximize my time outside, and meals that combine fresh local food with some good protein and/or fat.  This dip includes it all!  This dip works geats as a party appetizer or even a light summer meal.  This is one of my favorite dishes to take to a party or cook-out.  Honestly this dip is always a party favorite, and not just with vegan friends.  Everyone seems to love it!


Vegan Bean Dip

  • 2 cans vegetarian refried black beans
  • 1 16 ounce jar of salsa (or 2 cups homemade salsa)
  • 2 avocados
  • 1/2 cup non-dairy plain yogurt (obviously if dairy isn't an issue for you, you can use regular)
  • 1 tsp lime or lemon juice (helps prevent avocado from browning)
  • Lettuce (finely chopped)
  • Cilantro
  • Tomatoes (chopped)
  • Scallions

Mix beans and salsa together. Spread on the bottom of a 9x13 pan.  Mash avocados and mix in yogurt and lime or lemon juice.  Spread on top of bean and salsa layer.  Top the layers with lettuce, cilantro, tomatoes, and scallions.  (I don't measure these out.  I just use what I have and load it up with as much fresh veggies as possible).  Adding a vegan cheese like Daiya is an option or shredded goat cheese or dairy cheese depending on your cheese preferences.  I think it tastes amazing without the addition of cheese.  Finally, serve with your favorite tortilla chips. 

Monday, March 12, 2012

Parsnip Fries


Move over potato, there's a new fry in town.

Parsnips have never rated in my top 10 veggie list.  Recently that changed.  I saw a blog post using parsley roots as fries and suggesting parsnips could work as well.  Parsnips did work out quite fabulously and they have quickly crept up the ranks in my mind.  My history with parsnips is chopping them up and adding them to a pan of roasted veggies, or a couple times in a stew or soup.  My view was that they were good.  Not great.

My connection with parsnips is that I continue to buy them because they are still available from the harvest last fall, which means it's one of the few local veggies I can buy in Michigan in March.  This has fueled my determination to find ways to use this root vegetable.

Parsnips are the albino cousin of the carrot.  While they don't contain the beta carotene that carrots do they pack their own nutritional punch.  Parsnips contain a nice amount of fiber which aids in healthy digestion.  They also contain a good amount of vitamin C which aids in immunity, and really who doesn't need that in the middle of March in Michigan?  Some other goodness found in parsnips is calcium, iron, magnesium, and potassium. This crazy little vegetable is also a shining natural source of folic acid, so if your an expecting, or soon to be expecting mama, take note of this veggie. 

These fries are a great pairing along side a sandwich, soup, or as a wholesome snack for the kiddos or mama! I could honestly graze on these all day long.  When parsnips are roasted their natural sugars create a sweetness.  Imagine a sweet and salty french fry.  This is it.
 

Parsnip Fries

Parsnips
Olive Oil
Dried Parsley
Dried Rosemary
Sea Salt

Directions

Scrub or peel parsnips.  (I personally like peeling them especially since they've been stored since last fall and it makes them seem a little more fresh to me).

Slice parsnips lengthwise.  Make slices thin like fries.

Toss with olive oil, parsley, rosemary, and sea salt.


Roast at 400 for 30-40 minutes on a lightly oiled cookie sheet.   Check on fries at this point and stir them.  They may need to cook a little longer depending on how thick they are cut. Check every 5 minutes.  They should be cooked all the way through. The longer they are left in the crunchier they become. 

Dip in a little side of organic ketchup and I'm sure you'll be amazed!


Tuesday, December 20, 2011

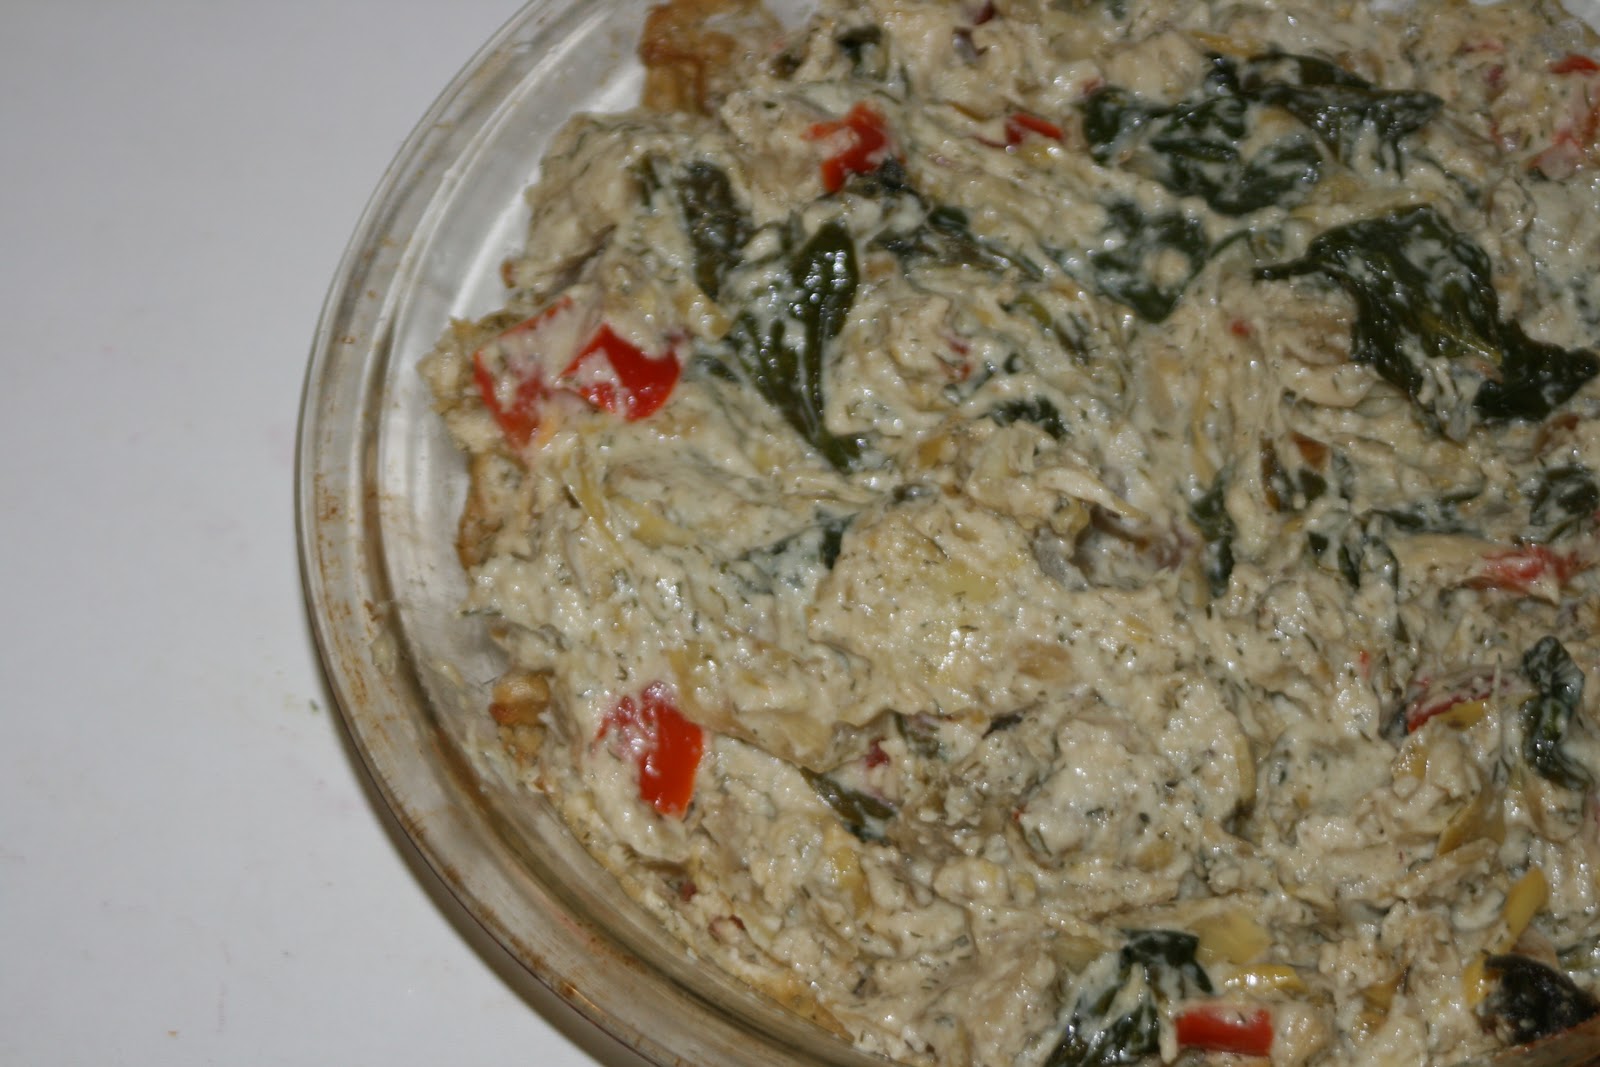
The Ultimate VEGAN Spinach Artichoke Dip

I just had to share this recipe with you.  I cannot take any credit for any part of creating it.  It was passed along to me recently and I quickly fell in love with it.  I made no alterations or changes.  It is seriously perfect.  Especially for those of us that just can't do dairy but yet all those gooey, creamy dips at parties seem to be calling our name. This, my friends, is a non-dairy bliss-filled dip.  It doesn't last long in our house.  My girls love it. I love it. My husband would probably eat the whole thing by himself.
We usually slice up some carrot and kohlrabi sticks to eat with this.  It's also fabulous with crackers or chips.  Really it's just pure amazing.  It's been so long since I've been able to enjoy a creamy, warm spinach artichoke dip.  I haven't touched the stuff in ages because dairy and me just don't mix well.  I always walk away from an encounter with dairy feeling ill, and usually end up having cold symptoms the following day...the biggest of which is my ears feel plugged and congested.  It's the weirdest thing.  I wondered for years why this happened to me and wouldn't you know as soon as I removed dairy it was gone.  Stomach issues gone.  All the sinus issues gone.  Interesting stuff.  So for me this is a pure treat and one we've made often since being gifted this recipe.  I believe the original recipe was from VegNews.  I hope you find it as purely amazing as I have.


Spinach Artichoke Dip

3/4 cup raw cashews
1/2 cup finely diced onion
1/2 cup finely diced red pepper
2 cloves garlic
1 can artichokes, chopped
5 ounces fresh spinach
1/2 cup hot water
2 TBS lemon juice
1 TBS Nutritional Yeast (different than yeast you use for baking)
1 tsp sea salt or to taste
1 TBS Dill (optional)


1) On medium-high heat, saute onions, red pepper, and garlic.  When onions have become transparent, add in the artichokes and saute for a few more minutes. Add spinach and stir until well mixed and spinach begins to wilt slightly.
2)In a blender, combine cashews, water, nutritional yeast, and salt until smooth. Add lemon juice and blend well.
3) In a bowl, combine the two mixtures. Stir well.  Transfer to and oven-proof baking pan and bake at 350 for 15-20 minutes.  It should be a bit bubbly and lightly browned around the edges.  Another option is to place it under the broiler for a few minutes to get a nice, lightly browned crust on top.

Finally, enjoy your pure bliss!!!!

Sunday, December 11, 2011

Brussels Sprouts


I personally never thought I liked brussels sprouts, along with a lot of other veggies that I've now grown to love.  I think it's just one of those veggies kids love to hate and I was very much in agreement with all those other kiddos.  So I never bought them or ate them.  Well wasn't I a little surprised when I started buying them in the last couple years and fell in love with them.  They are so good.  Why did I hold out for so many years? Well at this point my daughters haven't joined the crowd of brussels sprout haters.  In fact, my oldest daughter has been requesting brussels sprouts quite a bit this fall.   She loves finding them at the farmers market.  The way they grow is just fascinating.  If you've never seen them you should google a picture of them on their stalk.  It's really a pretty fun thing to pick up at the market and let the kiddos help pull them off the stalks.  It's mid-December and I'm still buying them at our local market.

Brussels sprouts actually improve in flavor as the weather cools.  They become sweeter and more tender after they've gone through a few frosts. 

Brussels sprouts also contain a good amount of vegetable protein.  Vitamin K, Vitamin C, Maganese, and Folate are included in the list of things brussels sprouts are high in.  They also come packed with lots of fiber and are thought to be a digestive stimulant.

Really they are just a tasty veggie that our family is coming to love.  I wanted to share with you our favorite way to make them, which we adapted from the book, " From Asparagus to Zucchini."

Brussels Sprouts Braised with Apple Cider

  • Brussels Sprouts ( I usually do one stalk at a time) (original recipe calls for 12 large)
  • Sea Salt
  • 1/4 cup apple cider
  •  cooking oil or water
Trim Brussels Sprouts and remove outer layer or two of leaves.  Cut in half. Sprinkle salt evenly and lightly over bottom of pan.  (I do these in my cast iron pan so not sure the difference in a regular pan).  Lay Brussels Sprouts cut side down in pan.  Cook until deep brown or almost black in some places, about 5 minutes.  I usually end up stirring them up a bit and letting them cook another couple minutes.  Add apple cider, cover pan, and turn off heat.  Let them continue cooking off the heat another 5 minutes.

Tuesday, August 16, 2011

Cherry Tomato Salad


I'm on a serious tomato kick right now.  I can't seem to get enough.  I'm just loving me some yummy organic tomatoes!

At the first bite of this salad, my 2 year old (almost three so I want to say 2 as much as I can before she turns 3!) proclaimed, "Mommy this is delicious!"  Ok any time my little one says that, especially lately, I take mental notes.

I had remembered seeing something like this in a Vegetarian Times magazine a couple years ago.  We needed lunch and I had all these beautiful tomatoes sitting on my counter.  So this is another one of those things I just threw together and didn't measure out exactly so enjoy experimenting and putting your own personal touches on it!  I hope you enjoy it and find it as tasty and delicious and my sweet Norah did. 


Cherry Tomato Salad (Vegan & Raw)

Cherry Tomatoes (add different sizes & colors) (I used around a quart of tomatoes)
1/2-3/4 cup Fresh Basil
Olive oil
2 cloves garlic
1/2 Avocado
1 Cucumber
1/3 Sweet Onion

  • Chop some cherry tomatoes in half and others in quarters.
  • Puree 1/4-1/2 cup basil, garlic, and olive oil in blender or food processor, making a pesto of sorts. Making the pesto thin enough to stir and coat tomatoes.  Depending on how many tomatoes you use, you may have some leftover pesto, which can be added to sandwiches, pastas, or salad dressings.
  •  Toss cherry tomatoes with pesto.  Allow to marinate for up to 30 minutes. 

  •  After tomatoes have marinated mix in onion, cucumber, avocado, and additional chopped fresh basil.

 Add a fresh vegetable juice and you have yourself a tasty, delicious lunch to sit on your deck and enjoy a beautiful summer afternoon!

Saturday, May 7, 2011

Kale Chips


Dark leafy green vegetables are the most missing vegetable in the American diet. These leafy greens are some of the most nutritionally dense foods we can put on our plates and in our little kiddos bodies. These dark greens are high in calcium, iron, potassium, magnesium, zinc, and vitamins A, C, E, and K. They also contain high amounts of fiber, folic acid, chlorophyll, and many other phytochemicals and micronutrients. Not only do they come with a power punch of nutrients but they are also fabulous for boosting the respiratory and immune systems. Spring is a wonderful time to be eating lots of greens because it is a very damp, wet, mucus producing season, especially in kiddos. Just think of all the colds that jump around this time of year. Leafy greens are good for building the respiratory system and reducing congestion and mucus. Have I convinced you yet that you should add some greens to your plate????

Kale has become a staple in our house the last few years. I will fully admit it took me a while to become fond of this leafy green, and some creativity at first. But now it is a staple on our grocery list. We throw it in smoothies, stir-frys, eggs, soups, pesto, shredded in salads....you name it.
A side note for those of you that are into gardening, I have found that kale is one of the easiest vegetables to grow. And hearty! I have continued to pick kale from our garden long after everything else is done producing. The last couple years my kale has lasted into December. So that is an easy way to have some fresh, organic kale all summer long! Not to mention, my daughter thought it was so fun last summer to nibble on the leaves she picked from the garden.


One of our favorites is kale chips. My girls LOVE these. They are so, so, so easy and so delish! They be a great compliment to a meal or a nice snack.

Here's our very easy kale chip recipe:

1 bunch of washed kale.
Lemon juice (Fresh or Costco carries an organic brand that has no preservatives)
Olive oil
Sea Salt
Nutritional Yeast (optional) (this is VERY different from regular yeast. It is not a leavening agent but a nutritional condiment packed with B vitamins. It can be found at a health food store)

Tear the kale leaves off of the stalks into "chip" sized portions.

Put kale leaves in a bowl and toss with a SMALL splash of olive oil and lemon juice. The goal isn't to get them really wet but just to very lightly coat the leaves. The more wet they are, the longer they will take to cook.

Lay leaves on baking sheet and sprinkle with sea salt and nutritional yeast (if using)

Bake in oven at 350.

I find time varies depending on how damp the leaves are. Continue to check them frequently.

They are done when they are slightly crisp.

Enjoy!!!