Showing posts with label Baby friendly. Show all posts

Thursday, June 26, 2014

Jell-o (Vegan)

Jell-o seems like a childhood novelty.  I have fond memories of those brightly colored jello jigglers at almost every holiday, just in different bright, radiant colors . BUT now I would rather my girls not be ingesting the gelatin and food dyes found in most of those tasty little treats geared to kids.  I have played around with homemade jello for the last couple of years.  My girls have usually liked it but recently I nailed it. It's so easy and quick and I feel way better about serving this to the little ones in my life.

This recipe uses Agar Agar, which is plant based and derived from sea vegetables. Over the past year I have learned so much more about good quality gelatin and it's health benefits that I would actually like to try that as well. Either way it's creating a snack with a quality ingredient that doesn't have all the extra dyes, chemicals, and preservatives.

The recipe I used had 3 ingredients.  Below is the base or skeleton of the recipe. Start there and play around.  Adjust the flavors.  Get creative.

It would work to combine different juices, fruit purees, or even add fruit pieces (which I haven't tried but everything I have read online says it will work).  Sweetener could also be added.  I have been using 1 cup of elderberry tea  that I make from simmering whole elderberries with water.  Elderberries are  immune boosting so I will be making these this fall when the nasty colds and flu start rearing their ugly heads again.
I then add 1 cup of 100% Organic Grape Juice.  My girls seem to think it is sweet enough so we roll with it. I personally think the trick is what the jello is poured into to set.  I have been using little silicone molds I picked up at Ikea and Michaels, and my silicone muffin cups.  This has made a world of difference. Not to mention they turn out cute and are in fun little shapes.  Yep, move on over Jell-o Jigglers.
  If you come up with a favorite combination please do share.  This is becoming a staple at our house, and I would love to experiment with some different flavors and fruits we haven't used yet.


Jell-o 

2 cups of fruit juice
2 tsp Agar Agar powder

Heat juice on stove.  Before it boils add agar agar and stir constantly until it boils. Once it reaches boiling make sure agar agar has been dissolved and then allow the mixture to simmer on low for 5-10 minutes. Finish by pouring into molds.  Allow to cool on counter top and then serve.

*if using agar flakes you will need to add 2 TBS 


Thursday, December 29, 2011

Vegan Chocolate/Carob Pudding

I've never been much of a pudding fan but my girls love it.  Maybe it's a kiddo thing?  I've loved that I've found a whole foods based pudding without the normal additives.  It tastes pretty good, for pudding.  My girls on the other hand go crazy for it.  We've had other little friends over and fed it to them, and they love it too.  So it's tested and tried by several little people who all give it two thumbs up.

The thing I love about this recipe is the avocados.  I love finding ways to get healthy fats into my girls.  They loved avocados plain as little tykes but I may have overdosed them on avocado because they are both in a phase where they just don't want avocados on anything.  I can hardly believe it.  I love avocados.  I could eat them all day long.  They aren't local or seasonal but I enjoy avocados most of the year.  So why not put them in pudding?  Chocolate and avocados seem like a weird pair but really they do go together.  The avocado creates a creamy texture.  For my oldest daughters 1st birthday I made chocolate cupcakes with an avocado chocolate frosting.  All vegan. They were quite tasty.  I say that so you don't rule it out before you try it or at least letting the little ones try it.  This can be made to even be baby friendly.

I have seen several recipes over the last couple years on raw puddings that involve cacao powder and avocados so tonight I played around and created our own version.  There are lots of ways to modify and play with this recipe.  Get creative. Taste as you go.  Or better yet, let the little ones taste as you go!


Chocolate/Carob Pudding


3 avocados 
10 dates
1/2 cup non-dairy milk (I've used almond and coconut milk)
1 tsp vanilla
1 TBS coconut oil (melted)
Juice of 1 orange
1 TBS shredded coconut (unsweetened)
Banana (optional)
4-6 tbs carob powder or raw cacao or cocoa powder
Orange zest (to taste)
Dash of pink Himalayan salt

Blend all ingredients together.

****could omit the cocoa/carob powder if feeding to a baby 
****Soaking the dates in water for an hour or so helps to soften them for blending.  If you don't plan ahead for that, which I usually forget, add dates to some hot water and let them set while you prep the rest of the ingredients.  This is usually enough to soften them for blending.
**** the banana gives it a bit of a banana taste so that's a positive if your kiddos like banana if not  omit or reduce by half
****I topped the girls with some unsweetened carob chips and they loved it
****Strawberries would be a delicious topping as well.
**** I limit my girls intake of chocolate.  The  Theobromine in dark chocolate is a stimulant and it certainly gives my girls extra energy they aren't in need of.  While I'm not a big fan of the 'malty' taste of carob my girls love it.  That's a win, win situation. They get a tasty treat and they will still go to sleep at bed time. 
****maple syrup or raw honey could be added to give the pudding a little more sweetness

Experiment.  Get creative.  Enjoy watching the kiddos get really messy chocolatey faces.  Have your camera ready! The pics are priceless!

Saturday, November 12, 2011

Applesauce


A couple of years ago my mom got me a canning kit for Christmas.  I was so excited.  I felt so domesticated.  And then yes I felt a little old too but really I was just super excited about being able to preserve food that was grown locally, and to make some fabulous baby food.

One of my favorite and easiest things to can is applesauce.  I grew up on homemade applesauce and I've never been a fan of the store bought stuff.  The taste is just so different when you've had homemade applesauce.  It's remarkable. So that is a warning that your kiddos may turn into applesauce snobs, which I would argue there are much worse things. 


This year I canned two bushels of apples for applesauce. I have quite the pantry full of applesauce.  I am guessing we will go through it much quicker than I can imagine.  I've been doing more and more of my baking with applesauce.  I love this because I don't add sugar to my applesauce and then I use that pure applesauce to baked goodies so that I can eliminate most or all of any granular sugar.  My girls love muffins and homemade breads and I love making them as healthy and wholesome as possible. For me, part of that process is eliminating or at least radically decreasing as much sugar as possible. Applesauce makes an awesome sweetener to bake with.  It does take a little experimentation but it does work.

Our homemade applesauce also makes a fabulous snack around our house.  There are ways to add some extras to make it a more hearty snack.  A few fun additions are cinnamon, nutmeg, ground flax seed or chopped walnuts or pecans.  Applesauce also makes a wonderful baby food.  Can it in smaller jars or even freeze it in ice cube trays for smaller portions.  I used to add a little applesauce to baby food purees my girls weren't wild about or willing to eat otherwise.  I often added it to a squash puree.  I've also added it to green purees if they were have a day of turning their noses up to it.  (kale, spinach, broccoli, swiss chard...).  I was willing to sweeten it a bit to at least get the greens into them!

My one suggestion with making applesauce is that you find the "cleanest" local apples possible to can.  Apples rank as one of the top foods that are heavily sprayed.  Even though were into November, most orchards have plenty of apples stored up that are still for sale.  If you are in Grand Rapids, check out Wells Orchards.  They have great prices and do a farming practice called Integrated Pest Management.  I've been getting my apples there the last few years and they are always very delicious and I feel pretty clean. Apples are hard to grow organic and I have to remember it's also about the local farmers livelihood and they are doing the best they can. Sprays are expensive.  They'd really prefer not to have to do them either but they also are counting on that income.  I think Wells has a really great balance and uses really natural processes but isn't certified organic, which I'm personally fine with.  Have a conversation with the folks at the orchard and ask questions.  It's great to know whose hands have been loving your food before it gets to you.

Applesauce

It really is quite simple.  I washed my apples.  Then I cored them with my little hand held corer I bought a few years ago at Bed Bath & Beyond.  I left skins on and tossed them into a stock pot with a little bit of water in the bottom.  I put the lid on and let steam for a few minutes.  I stir them a few times.  The apples will start to soften a bit. 

Next I just put them in the blender and happily blended away until a nice apple sauce consistency happened. 

 
****Now I will put a disclaimer that recently my hubs came home with a surprise vitamix (seriously that may have won him hubs of the year award!) and that thing can pulverize anything very quickly.  So with that said it didn't take long for applesauce to happen and I didn't worry to much about how soft my apples were.  BUT I have done applesauce this way for years and always used my regular blender or food processor.  You may just have to play a bit with how soft you need the apples to be and how long you need to blend.****  

 
Next step was to put the applesauce in a large stock pot or bowl to really blend all the batches and flavors together.  By the end of my applesauce making adventures I just poured right from the blender into the jars and it was just as great.  So up to you how much work you want to do!


 Final step was to put jars in the canning pot and process (cook) for 20 minutes. 


There you have it.  Homemade sugar-free applesauce from a local orchard.  Much cheaper than store bought organic variations and well worth the work because the taste is unbelievable!

****Spices can be added to the applesauce in blender to make spiced variations (think nutmeg, allspice, cinnamon, cardamom, cloves).  I personally like to do mine plain and then it has a lot more variety and options for cooking and baking with.  We will sometimes open a jar of applesauce and warm it over the stove on low with a combo of spices. Let's just say delicious!  ****

Wednesday, November 2, 2011

Vegan Pumpkin Spiced Ice Cream


Vegan Pumpkin Spiced Ice Cream

1 can coconut milk
1 cup coconut milk beverage (or any other non-dairy milk)
1 1/2 cups pumpkin puree (or canned pumpkin)
1/2 cup pure maple syrup
1 tsp vanilla
1 tsp cinnamon
1/2 tsp. nutmeg
1/4 tsp. cloves
1/8 tsp. ground ginger

Combine ingredients in blender.

Allow mixture to chill in fridge for 1-2 hours.

Process in ice cream maker or allow to "set" in freezer.

Tips:

If you start with chilled coconut milk and non-dairy milk beverage it takes less time to chill mixture.

Full fat coconut milk makes the creamiest ice creams but I usually stock up on Trader Joe's (when I get to one!) coconut milk, which has less fat but also costs less.  It works just fine and makes a great ice cream.  

I like to minimize sugar in our life so I usually try to use maple syrup or local raw honey as sweeteners, but you could play with lots of other sweeteners and also the amounts. 

Tuesday, August 9, 2011

Chia Seed Pudding


We've recently discovered Chia Seeds. This little food has become a new exciting addition to our whole foods way of eating  (I try to avoid the word 'diet' because it just brings so many negative connotations with it).   When I first started buying chia seeds it made me smile as I added them to my smoothies because I couldn't help but have the "ch-ch-chia pet" song dancing through my mind. 

As I've learned more about them they indeed are powerful enough to have their own little jingle.  Chia is an edible seed that comes from the desert plant Salvia hispanica, which is a member of the mint family.  The plant grows abundantly in southern Mexico.   Chia seeds are very rich in Omega 3 fatty-acids.  Chia seeds are richer in Omega 3's than flax seeds, which makes it the highest vegetarian source of Omega 3's.  Some experts even claim that these little seeds are more abundant in Omega 3's than some sources of fish, and you don't have to worry about the levels of contamination in the seeds unlike in the fish sources.

These seeds are a great balance of protein, fiber, carbohydrates, and fat. Chia comes from a Mayan term meaning strength.  Chia seeds contain approximately 20% protein.  They are often considered among athletes to be an endurance food, and were referred to as " Running Food" by the Aztecs.  

Another great perk is that these seeds don't need to be ground for the body to absorb and assimilate all of their nutrition.  Not only this but Chia seeds are raw and unprocessed and also are a great source of antioxidants!  A super food that can easily be added to salads, smoothies, granola bars, cereal, dinners, baked goods,...possibilities are endless!  They can be found at a local health food stores and on several sites online. 

We recently discovered Chia Seed Pudding.  It's so good.  Reminds me a bit of tapioca pudding which as a kid I wasn't found of the texture but there is so much goodness in this recipe that it's divine!  My girls and my husband gobbled this up so quickly the first time I made it that I was lucky to sneak in one bite!

Chia Seed Pudding  (adapted from Rawmazing.com)


Pudding
  • 1 3/4 cups cashew cream (see below)
  • 1/2 cup chia seeds
  • 1/2 cup maple syrup, agave, or raw honey
  • 1 teaspoon vanilla
  • 1 teaspoon cinnamon
  • 1 cup strawberries, sliced
  • 1 cup blueberries
1. Mix together cashew cream, chia seeds, agave, vanilla and cinnamon. Set aside.
2. Slice strawberries.
3. When chia pudding has thickened up (about 5-10 minutes) stir in sliced strawberries and blueberries (or whatever local fresh fruit you happen to have)
4. Keep refrigerated.

Cashew Cream:
  • 2 cups cashews, soaked overnight in the refrigerator
  • 2 cups water, filtered
1. Drain and rinse cashews.
2. Combine with filtered water in blender (I used a high speed blender) and blend until smooth.
3. Refrigerate


If your wanting a true RAW dessert you can omit the vanilla or use actual vanilla bean and use raw, local honey.  It's really is divine! A great snack, dessert, or breakfast to serve the kiddos with a power house of  nutrition.
Enjoy!!


Saturday, August 6, 2011

Veggie Patties


I love cooking. I love being in the kitchen.  However, sometimes I just need a break and need something easy to put together for dinner.  Something that hasn't required much planning or prepping. Something that can travel well or that is easy for a sitter to feed the girls.  Easy.  Well this is one of my favorite "go to" meals for those days.

Now granted this recipe does require a bit of cooking and prepping one time, but then you can freeze them and have lots of easy meals stored away for those days when you need an easy meal for your kiddo.  We've chose to not buy boxed, processed food and instead focus on whole foods.  Well whole foods require some cooking, prepping, cutting, chopping, etc.  It's a little more work than just grabbing those easy boxed meals off the shelves at the stores, but it's so incredibly worth it.  You and your kiddos will be thankful for the work and time you've invested in your family's health!!  To start your kiddos off on a healthy path with whole foods right from the beginning is such an incredible gift for their long term health.  Not to mention that it keeps you as the parent healthy and well.  If as parents we feel well, we are more likely to have the energy to keep up with our kiddos and interact and play with them, which of course is priceless time.  I have found when I'm being intentional with caring for myself I am more present and patient with my girls.   I've also quickly realized the times when I'm not balanced because I tend to get frustrated quicker over smaller things, and I feel like I've lost all patience.  This is always a good reminder for me to check in and evaluate my self and what's happening.  So all that said please take time to check in today and ask yourself if your taking good care of you!

So now on to veggie patties...

I was inspired by our favorite local restaurant to create these. They have amazing black bean sweet potato burgers.  I figured I could experiment a bit and create something that would be wholesome and healthy for my kiddos and make a great meal with lots of hidden extras in it.  It works great for our family because I think my girls could live on raw veggies and fruits, which is fabulous but they need some other nutrients as well.  So I load these up and they make a great vegetarian dinner and/or finger food for a younger baby (just adapt recipe to foods baby has been introduced too).

I don't have a specific recipe for these, which is what makes them so great.  You can really use what you have on hand to make these.  They can also be adapted to be specific to what your kiddo enjoys.  Another great perk of these veggie patties is that you can add some extras into them that might be challenging to get into your kiddos food otherwise.  I'll share with you what I did for this batch but get creative and experiment. 

Veggie Patties

2 roasted sweet potatoes (so they are soft and easy to mix up)
1 cup cooked quinoa ( I started with 1/2 cup dry quinoa )
1 cup black beans
kale
shredded zucchini
parsley
rolled oats or rice flour (basically just something to help bind them)
ground nuts or seeds ( I like to use ground sunflower seeds)
(dried spices, Mrs. Braggs Soy Sauce, tomato paste are good options to give flavor as well, especially for adults!)


I just toss everything in my food processor and let it do the work of mixing it all together.  Keep an eye on the consistency and add enough of the oats or flour to make sure the mixture will start to thicken slightly.  You'll want to have it thick enough that it won't just fall apart when you begin cooking. 


Now this is where things get messy! I use wet hands and make little patties on a lightly oiled baking sheet or skillet. 


If baking I usually bake at 350 and check every 5 minutes.  Typically with in 10-15 minutes they are browned enough on the bottom that I can flip them over and finish cooking on the opposite side.  When flipping it's important to gently press them down so that the middle will cook as well.  Another 10-15 minutes usually finishes it up.  Cooking time will depend on what all you have in them.

I prefer to cook them on our skillet.  It takes a little longer because there are a few rounds but I can keep a closer eye  on them and make sure they don't get burnt.  They also don't tend to be as crumbly when I cook them on the skillet.

Eat plain or top with avocado, goat cheese, tomato, organic ketchup, or sprouts.  Serve with another side of veggies and you can be assured your kiddo has had a heaping amount of veggies in that meal!

The last batch I did made 20 burgers.  I tossed the extra ones in a ziploc baggie between layers of wax paper and froze. 

There you have it.  A whole foods veggie patty that you can serve your kiddos for a wholesome, easy meal! 


Sunday, July 31, 2011

Mango Sorbet

I know I've mentioned this before but I love ice cream.  This love of mine doesn't go well with my dairy intolerance.  So I am constantly trying to come up with new non-dairy ice creams.  My girls are loving it too.  In fact one evening a week ago we'd been grazing a bit that day on random foods and we got home a little late and no one was real hungry for dinner.  So what did we do....we had ice cream for dinner.  It was awesome.   I didn't feel a bit bad about it either.  It was homemade and loaded with strawberries, bananas, almonds, and coconut milk.  Perfect ending to a very long, hot day.

I usually try to use local fruits that we've frozen for our ice creams, but this was an exception.  Randy had stopped at the store recently and came home with quite a few mangoes because they were having a stellar deal on them.  Well I pretty much forgot about the mangoes because our fridge is packed with all the fruit we've been getting at the farmers market.  I realized yesterday that they had gotten a bit soft so I peeled and froze them, with the intention of making something yummy out of them.  Well this is what I came up with last night.  So so good!

Mango Sorbet

Frozen mangoes
Pineapple (Canned or fresh)
Shredded Coconut

**I didn't measure things out but just added a bit at a time into the food  processor and played with consistency.  I froze 3 mangoes and by the end of the evening they were all gone.  (Norah and I did make a small batch for a snack as well earlier in the day!) I used almost half of a can of crushed pineapple but not much of the actual pineapple juice it was packed in.  I added in just a little bit of the shredded coconut while the mangoes and pineapple were mixing.  I then topped our bowls with a sprinkle of the shredded coconut.   My girls weren't huge fans of the texture the coconut created but of course it was ice cream so that didn't stop them for to long.

Viola' a yummy sorbet you can feel good about giving your kiddos, even if they didn't eat dinner!

Tuesday, July 12, 2011

Beets & Beet Greens

Beets.  Oh glorious beets!  We are just hooked on beets and lately on beet greens.  I've been buying fresh beets from the market the last few years and I have discovered a new favorite food.  I was very skeptical at first to buy beets.  I had no idea what to do with fresh beets.  I  also had distinct memories of pickled beets that my mom used to can, which as a kid weren't my favorite food to say the least.  So all this to say, I decided a few years ago to buy some beets at our local farmers market, and wouldn't you know, I LOVED them.  My husband began to love them.  My kids absolutely love them.  They are a staple at our house these days.

Well this year we joined a CSA for the first time.  It has been so great and I've been learning so much about different foods and cooking and preping tips.  At this point the CSA has consisted of lots and lots of greens.  I've been playing around and getting creative with lots of different ways to use greens and how to incorporate all these greens into our food.  Not only are we getting all these greens from the CSA but we also have a little garden that is producing lots and lots of kale and swiss chard.  All of this at the same time that my oldest daughter has begun picking the "green" things out of her food.  Hmmmm, not great timing for her to all of sudden go on strike against the greens!  Another reminder of how much we learn to release control over everything as parents, right? 

I was at the market a couple weeks ago and got really excited to see some fresh beets.  I've known for the past couple years that the greens on top of the beets are edible and actually quite good for you, but I've just never gotten around to using them before they went bad.  The leaves go bad quickly so it's important to use them as soon as possible, and they taste so much better as well.  This year I made it a point to use those leaves.  And again, wouldn't you know, I LOVED them.  They are tender, milder tasting green.  They are a great substitute for any recipe calling for spinach, or just use them raw in a salad.  We've even thrown the beet greens into our green smoothies.  I'm hooked on these beet greens right now.  Surprisingly my 2 year old, who has been doing some protesting over greens, gobbles them up in a recipe.  The taste is so mild I think she forgets she's been protesting.

Beets are very high in nutrients.  They contain an excellent amount of folate, which is great for pregnant mamas or those hoping to become pregnant.  Beets are also a good source of iron, vitamins A and C, carotenes, and fiber.  Really they are just super fabulous for you and your kiddos.

Our favorite is roasted beets.  I just toss diced beets  in my oven or toaster oven with a little olive oil and cook for about 45-60 minutes at 350.  I don't usually don't even peel beets. I rinse them in water and will use my veggie scrub brush lightly on them.  I've recently read that there really is no reason to peel beets because there are some great trace minerals that lie just below the surface of the skin of the beet.  If you want to peel them another way to roast them is individually in foil with a bit of oil.  When they are done you can unwrap the foil and let them cool to the touch and the skins will easily slide off after the beet is roasted whole.

Roasted beets make an excellent finger food for babies.  Just make sure you cut them into sizes that are appropriate for you baby's age.  My girls both loved eating beets.  Have a bib handy because babies and beets will create quite a mess but all of those amazing nutrients they are getting is completely worth it.  Additional warning:  beets can create some coloring of the stool so don't be alarmed if you or your kiddo eats beets and the next day or two have some reddish color in the stool or even urine.  This is normal!

There are other great ways to use beets besides roasting them.  Raw beets grated into a salad are quite tasty.  Juicing beets gives fresh juice a vibrant color and flavor.  Perhaps try steaming beets.  There are even lots of recipes out there calling for beets in brownie and chocolate cake recipes.  (I have yet to try these because I don't do much baking but they always sound real interesting).

One of my favorite way to use beets raw is in this Firecracker Beet Slaw recipe from Vegetarian Times.

Ingredients
  • 3 raw beets, peeled and shredded (3 cups)
  • 1 Granny Smith apple, shredded (1 cup)
  • 4 green onions, thinly sliced (1/2 cup)
  • 1/3 cup apple cider vinegar
  • 3 Tbs. olive oil 2 Tbs. Dijon mustard
  • 1 Tbs. agave nectar or 2 Tbs. sugar or 1 Tbs. Raw Local Honey
  • 2 cloves garlic, minced (2 tsp.)
  • 1 tsp. minced canned chipotle chile in adobo sauce (this does have a strong flavor with a bit of kick to it so if your kiddos don't like much spice you may want to omit this or just add half the amount of chipotle to half the recipe and save the other have for the kiddos)
  • 1/2 tsp. salt
 Directions


1. Toss together beets, apple, and green onions in bowl. (I shred these in my food processor which make it super easy)

2. Blend vinegar, oil, mustard, agave nectar, garlic, chipotle chile, and salt in food processor until smooth. Add to beet mixture, and toss to coat.  Enjoy!


So if you find yourself at a local farmers market this week, maybe you pick up some beets and begin experimenting with the beets and the beet greens.  I hope you discover a nourishing new food that you enjoy!

Friday, May 20, 2011

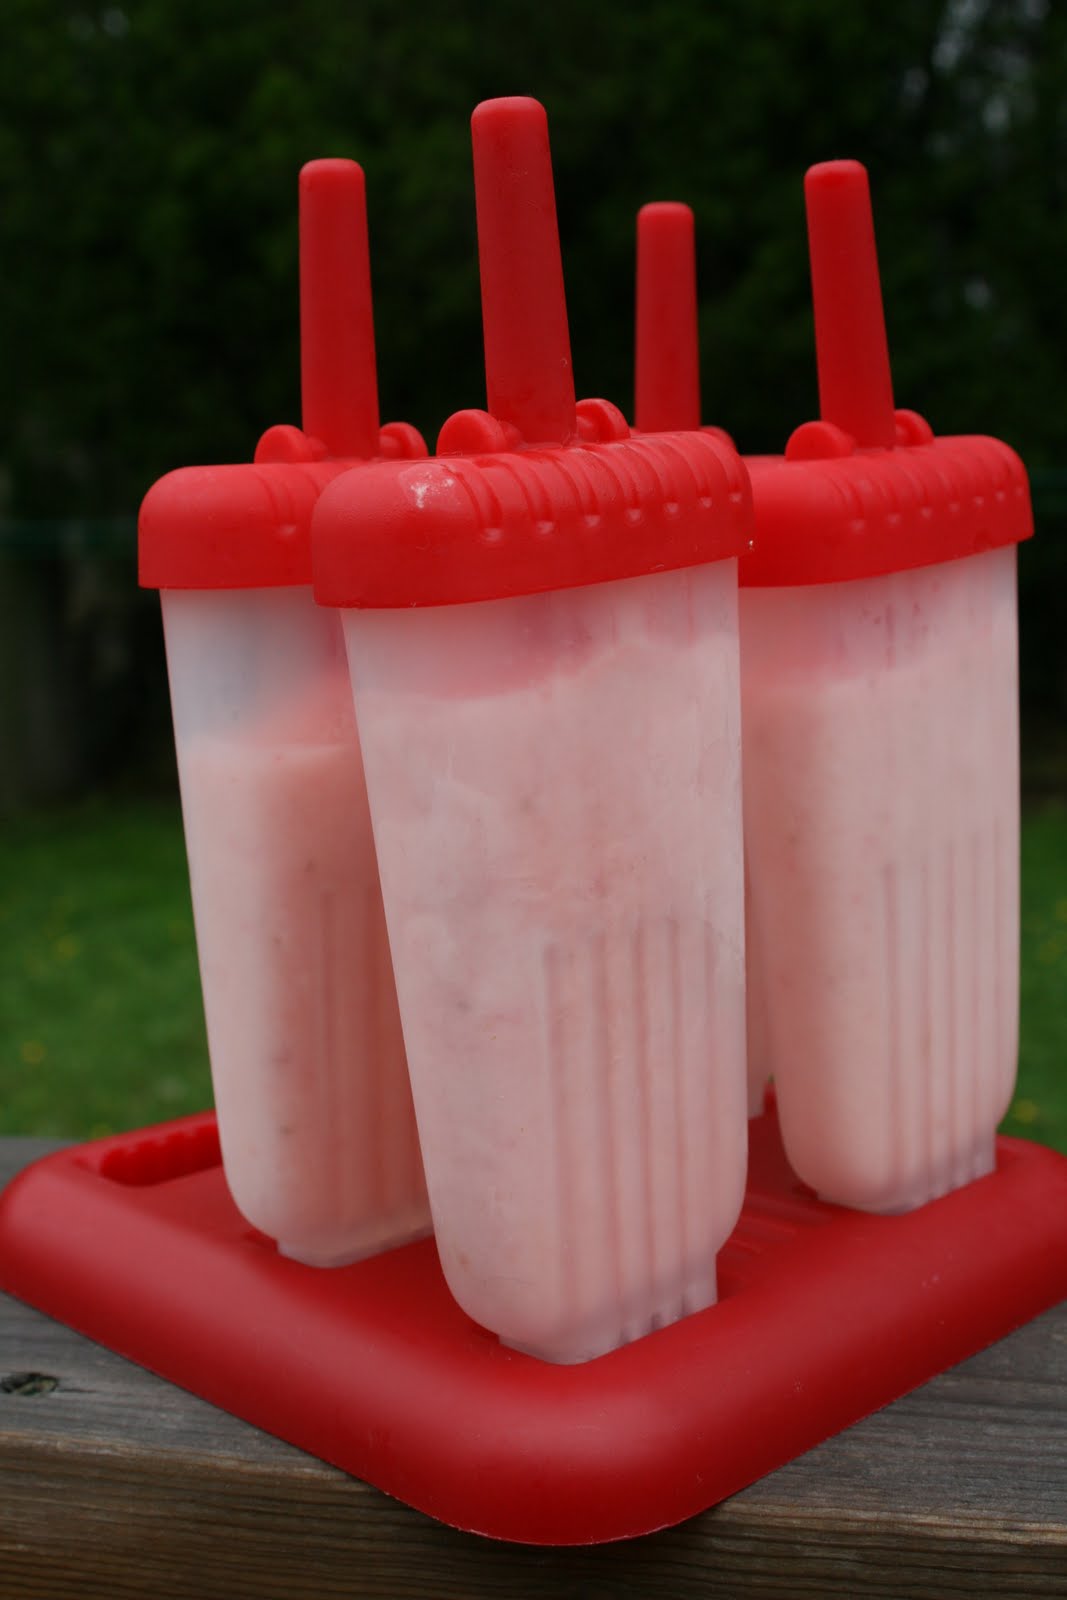
Healthy Pops


As hot days begin to settle in, my kiddos begin to request homemade popsicles more and more. They LOVE these healthy pops and just can't get enough. It's a super, super easy treat to serve up to your kiddos on a hot afternoon after they've crawled out of the pool, sprinkler, sandbox, or whatever else they are up to. These tasty little pops can help cool them off after all their running and playing, not to mention it's a great little treat that you can feel good about giving them. No added sugars, syrups, dyes, flavorings. Instead fresh, local fruit. A little taste of summer!

This has been our favorite combination recently.

*1 can coconut milk (the full-fat coconut milk makes for a quite creamy special treat)

*1 cup of frozen strawberries ( Michigan berries aren't quite in season so we are still using berries we froze last year)

*1 cup of frozen peaches (Same as berries...using some local peaches frozen peaches from last season)

Depending on the size of your molds you may have to modify the above amounts. If you have extra it tastes quite fabulous in a smoothie.

Toss everything in blender until creamy.

Pour into popsicle molds.


Freeze for several hours.

To get the popsicles out of the molds it helps to run it under warm water until it is lose enough to pull mold off.

Give this sweet tasting pop to your little one and let them enjoy a healthy, delicious treat. Have your camera to snap a shot of that sweet, messy little face!

Saturday, May 7, 2011

Kale Chips


Dark leafy green vegetables are the most missing vegetable in the American diet. These leafy greens are some of the most nutritionally dense foods we can put on our plates and in our little kiddos bodies. These dark greens are high in calcium, iron, potassium, magnesium, zinc, and vitamins A, C, E, and K. They also contain high amounts of fiber, folic acid, chlorophyll, and many other phytochemicals and micronutrients. Not only do they come with a power punch of nutrients but they are also fabulous for boosting the respiratory and immune systems. Spring is a wonderful time to be eating lots of greens because it is a very damp, wet, mucus producing season, especially in kiddos. Just think of all the colds that jump around this time of year. Leafy greens are good for building the respiratory system and reducing congestion and mucus. Have I convinced you yet that you should add some greens to your plate????

Kale has become a staple in our house the last few years. I will fully admit it took me a while to become fond of this leafy green, and some creativity at first. But now it is a staple on our grocery list. We throw it in smoothies, stir-frys, eggs, soups, pesto, shredded in salads....you name it.
A side note for those of you that are into gardening, I have found that kale is one of the easiest vegetables to grow. And hearty! I have continued to pick kale from our garden long after everything else is done producing. The last couple years my kale has lasted into December. So that is an easy way to have some fresh, organic kale all summer long! Not to mention, my daughter thought it was so fun last summer to nibble on the leaves she picked from the garden.


One of our favorites is kale chips. My girls LOVE these. They are so, so, so easy and so delish! They be a great compliment to a meal or a nice snack.

Here's our very easy kale chip recipe:

1 bunch of washed kale.
Lemon juice (Fresh or Costco carries an organic brand that has no preservatives)
Olive oil
Sea Salt
Nutritional Yeast (optional) (this is VERY different from regular yeast. It is not a leavening agent but a nutritional condiment packed with B vitamins. It can be found at a health food store)

Tear the kale leaves off of the stalks into "chip" sized portions.

Put kale leaves in a bowl and toss with a SMALL splash of olive oil and lemon juice. The goal isn't to get them really wet but just to very lightly coat the leaves. The more wet they are, the longer they will take to cook.

Lay leaves on baking sheet and sprinkle with sea salt and nutritional yeast (if using)

Bake in oven at 350.

I find time varies depending on how damp the leaves are. Continue to check them frequently.

They are done when they are slightly crisp.

Enjoy!!!


Saturday, April 16, 2011

The Incredible Avocado


Seriously. I think this is nature's most AMAZING food. Avocados were both of my girls first foods. Doesn't get much easier than this. And let's be honest. When your a mama of little ones easy is the ideal choice.
I think we should probably buy stock in the avocado industry as much as we use them. My girls love them but I must admit, I love them equally as much. David Wolfe (raw food guru) deemed his nickname as avocado....not goji berry, or cacaco, or spirulina, or medicinal mushrooms (all said to be super foods and funny nicknames). Nope he labels himself as "Avocado". Which is funny to me but also reminds me that the guru of the Raw Food movement has a deep love and confidence in the benefits of the avocado. I mean you wouldn't want to pick a food nickname that was a fad, right??

Avocados were staples when my girls were first introduced to solid foods. I would just mash up a little avocado (in the beginning I added a little breast milk to give it a thinner consistency) and serve. I threw them in the diaper bag when we were out and about and needed an easy, quick meal. All that glorious good fat found in an avocado. Fat that is so amazing for a developing baby.

As baby got older I would toss avocado in purees for a creamier texture. When we got to finger foods, this was an easy to eat and familiar finger food.

Now we use them in our green smoothies. Oh the creaminess it adds to our smoothies. Dynamite! I also add them as a garnish to soups, tacos, salads....just about anything. Guacamole is always a hit in our house. I'll smear them on a cracker or rice cake with a little goat cheese for an easy lunch for the girls. The possibilities are endless. I don't believe there is such a thing as an avocado overdose! :)

A little trick with the avocado is to keep the pit (seed) in it if your only using part of the fruit. This will help it from browning quite as fast. With little eaters you may find you only use little bits at a time and this way you can keep your fruit fresher longer.

Have a favorite avocado use? Please post and share with us!

Tuesday, April 5, 2011

Creative Baby Food

It's easy to think of all the foods you can do with baby. All the beautiful veggies and fruits. Especially if your starting to introduce solids during the height of the farmers markets. How fun to be able to introduce your kiddo to fresh local food right from the get go.

There are all sorts of theories to introducing solids. When? What? How? Veggies or fruits first? Grains? Food combining? Fats? Proteins? How much? How many times a day? When to increase? So many questions! These can be challenging things to sort out but there are so many references online and with your care givers, that I'm sure you'll find a rhythm to eating that makes sense and fits in line with your family and your already established way of eating.

There are some fun ways off adding some extras to your babies food, especially once they have been on solids for a bit and are doing well. You'll still have to watch and follow that 3 day wait rule to make sure you don't have a reaction but here's a few ideas that we did.

I would blend greens (kale, spinach) with coconut milk and add that to some quinoa. Gave it a slightly sweeter taste and yet was packed full of the amazing health benefits of dark leafy greens, protein of the quinoa, and a little extra fat with the coconut milk.

If I was having a hard time getting my girls to eat a puree, I could always add some homemade applesauce. And then that puree they were resisting was gone and often they were wanting more.

Avocado is nature's perfect food. Perfect for on the go. Slice it open. Smash it up. A yummy, nutritious meal. My girls still love avocados.

I have also added coconut oil and olive oil to their food for extra fat.

Once they got a bit older, I'd sprinkle some ground flax seed in their food. Obviously not much because you don't want it to cause diarrhea. But a little flax seed has some big benefits.

So I'd invite you to get creative! Experiment. Have fun.